
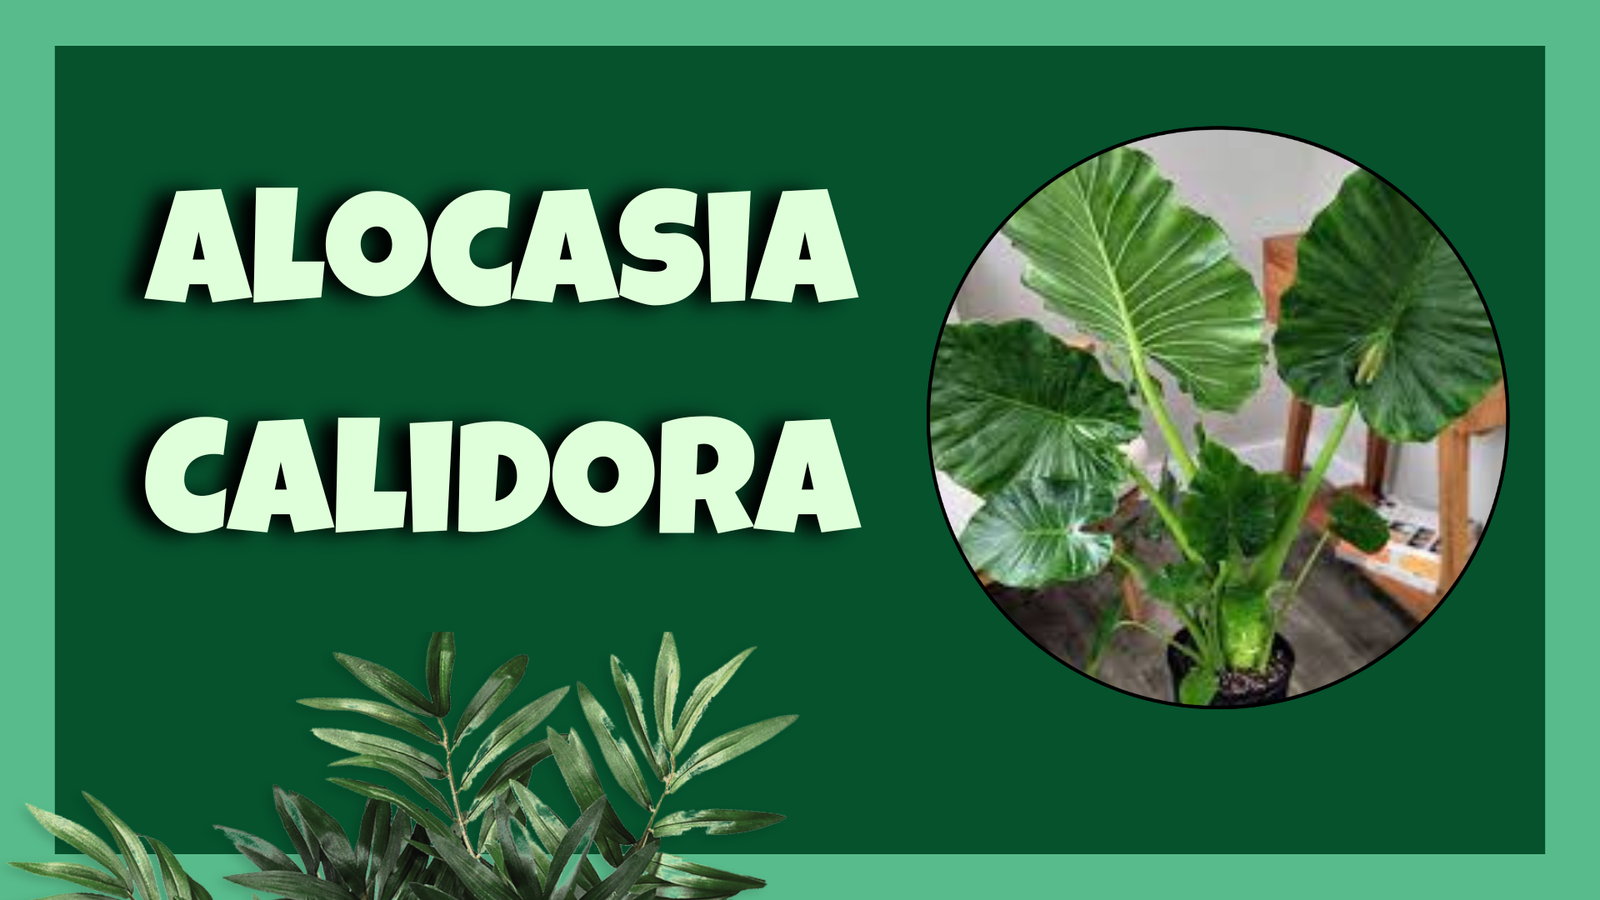
Alocasia Calidora Elephant Ear Plant
Prepare to be amazed by the sheer presence of Alocasia Calidora, a magnificent Elephant Ear plant that brings a dramatic, tropical vibe to any space. With its enormous, lush dark green leaves held aloft on sturdy stems, this hybrid is a true showstopper in the world of Alocasia and Elephant Ear plants. But bringing the jungle giant indoors requires understanding its needs. This guide teaches beginners and experts how to cultivate a thriving Alocasia Calidora and ensure it flourishes outside its natural-like habitat. Get ready to grow your own magnificent Alocasia Calidora.
Alocasia Calidora Plant Care Guide: A Magnificent Giant
The Alocasia Calidora, a stunning houseplant known for its impressive size and dramatic foliage, has become incredibly popular among plant enthusiasts. As a hybrid developed for cultivation, it combines desirable traits from its parent species, resulting in a robust and visually striking plant perfect for enhancing the indoor jungle aesthetic. Its defining features are its very large, glossy, ripple-edged dark green leaves, held aloft on thick, sturdy petioles, giving it the classic Elephant Ear silhouette on a grand scale.
While this tropical plant is undeniably gorgeous and makes a bold statement, achieving its full potential indoors requires thoughtful care. This detailed Alocasia Calidora care guide delves into everything you need to know, from light and water requirements to propagateion and troubleshooting common problems. Whether you are a seasoned aroid collector or new to the world of large houseplants, this guide will empower you to successfully grow and maintain your Alocasia Calidora. Let’s get started on cultivating your magnificent Alocasia Calidora!
Alocasia Calidora Care
Mastering Alocasia Calidora care involves replicating the warm, humid conditions of its ancestral tropical environment. Provide bright indirect light to fuel its massive leaves without risking scorch, and be diligent with watering, ensuring the soil remains consistently moist but not soggy to prevent the dreaded root rot. High ambient humidity is non-negotiable for lush foliage, and a well-draining potting mix is paramount for healthy roots. Consistent temperature, regular feeding during the growing season, and routine maintenance will keep your Alocasia Calidora thriving and looking its best.
Light
Alocasia Calidora, with its large leaves, needs plenty of bright indirect light to power its vigorous growth. While it can tolerate slightly lower light conditions, it truly flourishes when receiving ample, filtered sunlight, much like it would under a dense forest canopy. Direct sunlight is a big no-no; the intense rays can easily scorch the expansive leaf surfaces, causing unsightly brown spots and significant damage.
- Ideal Placement: Position your Alocasia Calidora near a large window facing east, where it can capture the gentle morning sun, or near a south or west-facing window that is shaded by a sheer curtain to diffuse harsh light. The goal is bright light that doesn’t fall directly onto the leaves.
- Signs of Insufficient Light: If your Alocasia Calidora isn’t getting enough light, its growth will be slow and leggy, with smaller leaves and less vibrant color. It might also droop as it stretches towards any available light source.
- Solution: Observe your plant’s response to its location. If it seems unhappy, experiment with different spots, ensuring it gets consistently bright indirect illumination. Grow lights can be a great supplement in darker indoor spaces.
Water
Consistent and thoughtful watering is one of the most critical aspects of Alocasia Calidora care, as this plant is quite sensitive to both overwatering and underwatering. The key is to keep the soil consistently moist but absolutely not soggy or waterlogged. Proper drainage is paramount.
- Watering Technique: Water your Alocasia Calidora thoroughly when the top 1-2 inches of soil feel dry to the touch. Stick your finger into the soil or use a moisture meter for an accurate reading. When you water the plant, soak the soil until water runs freely from the drainage holes at the bottom of the pot.
- Avoid: Allowing the pot to sit in standing water in the saucer, as this is a surefire way to lead to root rot. Empty the saucer a few minutes after watering.
- Adjusting for Seasons: Your Alocasia Calidora will require more frequent watering during the active growing season in spring and summer when the plant is actively pushing out new growth. During the fall and winter months, when growth slows down or the plant enters dormancy, reduce watering frequency significantly.
- Signs of Overwatering: The most tell-tale signs are yellow leaves, drooping leaves, and a mushy stem base. The soil may also smell foul.
- Signs of Underwatering: Leaves will begin to droop dramatically, the edges may become crispy, and the soil will pull away from the sides of the pot.
Soil
Choosing the right soil mix for your Alocasia Calidora is just as important as getting the watering right. This giant needs a soil that is rich in organic matter, provides excellent drainage, and allows for good aeration to keep its extensive root system healthy and prevent root rot.
- Ideal Soil Mix: A chunky, well-draining potting mix is essential. A good recipe includes indoor potting soil as a base, amended generously with materials like perlite, orchid bark, and coco coir. This combination ensures that while the soil retains some moisture, excess water can drain away quickly, and air can reach the roots.
- Avoid: Using heavy, compacted potting soil straight from the bag that doesn’t offer sufficient drainage. Clay-heavy soils are also unsuitable.
- Tip: The chunky components like orchid bark and perlite are key to creating the airy texture that Alocasia roots love, mimicking the decaying plant matter found on the forest floor in their native habitats. Regularly check the soil for compaction and ensure the drainage holes are clear.
Temperature
Alocasia Calidora, being a tropical plant, thrives in warm, consistent temperatures. Ideally, you want to maintain temperatures between 65°F and 80°F (18°C and 27°C) for optimal growth and health. They are not tolerant of cold.
- Ideal Temperature Range: Keep your Alocasia Calidora comfortably warm, between 65°F and 80°F (18°C and 27°C).
- Avoid: Exposure to cold drafts from windows or doors, and sudden temperature fluctuations, which can severely stress the plant and lead to root rot and leaf damage. Keep them away from heating or air conditioning vents that can cause temperature extremes and dry out the air.
- Winter Care: During the fall and winter months, ensure your indoor temperature doesn’t dip below 60°F (15°C), as this can trigger dormancy or even damage the plant. Stable temperatures are key to preventing common problems.
Humidity
High humidity is not just preferred by Alocasia Calidora; it’s absolutely crucial for its well-being and the health of its impressive foliage. These plants come from rainforests where humidity levels are consistently high. Dry indoor air, especially in heated or air-conditioned homes, is a common cause of common issues like brown leaf tips and edges.
- Ideal Humidity Level: Aim for humidity levels of 60% or higher. Anything significantly below this can cause stress.
- Methods to Increase Humidity Around the Plant:
- Using a humidifier: The most effective way to provide consistent high humidity is by placing a humidifier near your Alocasia Calidora.
- Pebble tray filled with water: Placing the pot on a pebble tray filled with water (making sure the pot is not sitting directly in the water) can create a localized humid microclimate as the water evaporates.
- Grouping: Grouping your Alocasia Calidora with other humidity-loving plants helps create a more humid microenvironment as plants release moisture through transpiration.
- Misting: While misting can provide a temporary boost, it’s not a long-term solution and can sometimes lead to fungal issues if done excessively without good air circulation. Focus on other methods for sustained humidity.
Fertilizer
To support the growth of those massive leaves during the growing season (spring and summer), your Alocasia Calidora will benefit from regular fertilization. This provides the essential nutrients it needs to thrive.
- Fertilizing Frequency: Feed your Alocasia Calidora every 2-4 weeks during the active growing season.
- Fertilizer Type: Use a balanced liquid fertilizer (e.g., 20-20-20 or a similar ratio) diluted to half or quarter strength to avoid burning the roots. A specialized tropical plant fertilizer is also a good option.
- Application: Apply the fertilizer to moist soil to prevent root damage.
- Winter Feeding: Do not fertilizer your Alocasia Calidora during the fall and winter months when its growth slows down or it enters dormancy. Over-fertilizing during this period can harm the plant.
Pruning and Maintenance
Regular pruning and maintenance are simple yet effective steps to keep your Alocasia Calidora looking its best and to promote healthy new growth. These tasks help the plant conserve energy and reduce the risk of pests and diseases.
- Removing Damaged or Yellow Leaves: Use clean, sharp scissors or pruning shears to cut back any leaves that are yellowing, brown, damaged, or appear unhealthy. Cut back the stem as close to the base of the plant as possible. This allows the plant to focus energy on producing healthy foliage.
- Cleaning the Leaves: Periodically wipe down the large leaves with a soft, damp cloth to remove dust. Dust buildup can impede photosynthesis. This also gives you an opportunity to inspect for pests.
- Support: Due to their size, older or particularly lush Alocasia Calidora plants might need staking to support their heavy leaves and prevent them from drooping or snapping.
10 Advantages of Having an Alocasia Calidora
Bringing an Alocasia Calidora into your home offers more than just aesthetic appeal; it provides numerous benefits that make it a rewarding plant to grow.
- Dramatic Statement Piece: Its huge, glossy leaves create an immediate focal point and add a touch of grandeur to any room.
- Exceptional Foliage: The large, ripple-edged dark green leaves are simply stunning and unlike many other common houseplants.
- Natural Air Purifier: Like other plants, the Alocasia Calidora contributes to better indoor air quality by filtering certain toxins.
- Humidity Contributor: As a plant that requires high humidity, it can slightly increase the ambient moisture in its immediate vicinity.
- Tropical Ambiance: Instantly transforms your space into a tropical oasis, evoking feelings of warmth and lushness.
- Stress Reduction: Caring for and being around plants has been shown to reduce stress and improve overall well-being.
- Relatively Fast Grower: With optimal growing conditions, Alocasia Calidora can put out new growth quite rapidly during the growing season, which is very rewarding to witness.
- Unique Texture: The wavy edges and glossy surface of the leaves add interesting texture to your plant collection.
- Boosts Home Decor: Complements a variety of interior design styles, from modern minimalist to bohemian lush.
- Sense of Accomplishment: Successfully growing and maintaining a large, striking plant like Alocasia Calidora brings a great sense of pride and accomplishment.
Indoor Placement and Styling Tips
Styling your Alocasia Calidora is a joy, as its impressive size and stunning foliage make it a natural centerpiece. Thoughtful placement can maximize its impact and ensure it thrives.
Choosing the Right Pot
The pot for your Alocasia Calidora is more than just a container; it’s part of the statement and crucial for the plant’s health. Choose a pot that is appropriately sized for the plant and, most importantly, has excellent drainage holes to prevent waterlogged soil.
- Size: Don’t go too large too quickly; choose a pot that is only 1-2 inches wider in diameter than the current root ball.
- Material: Terracotta pots allow for better air circulation and moisture evaporation, which can be helpful in preventing overwatering. Plastic or glazed ceramic pots retain moisture more, which might be suitable if you struggle with underwatering or have very low humidity, but require careful watering.
- Aesthetics: Select a pot whose style, color, and texture complement your home decor and enhance the plant’s dramatic appearance. A simple, clean-lined pot can highlight the plant’s foliage, while a decorative one can add extra flair.
Placement Ideas
Strategically placing your Alocasia Calidora can dramatically impact the feel of a room and ensure it gets the right light.
- Statement Piece: Place the Alocasia Calidora in a prominent location, such as a corner in a living room, a large entryway, or near a bright window where it can truly shine as a natural focal point. Use a plant stand to give it extra height if needed.
- Bright Rooms: Ideal for bright living rooms, sunrooms, or dining areas that receive ample indirect light.
- Grouping for Humidity: While it’s a large plant, placing it near other plants, especially tropical ones, can help increase humidity around the plant through shared transpiration, creating a beneficial microclimate.
- Avoid: High-traffic areas where its large leaves might be easily damaged, and locations near heating or cooling vents.
Styling Tips
Enhance the beauty of your Alocasia Calidora through thoughtful styling.
- Contrast: The dark green leaves look particularly striking against light-colored walls or furniture, creating a vibrant contrast that makes the plant pop.
- Texture Play: Combine the glossy, smooth texture of Alocasia Calidora leaves with plants that have different leaf textures (fuzzy, variegated, delicate) to create a visually interesting display.
- Scale: Use the height and breadth of Alocasia Calidora to add vertical interest and fill empty vertical spaces in your home decor. Its size works well in rooms with high ceilings.
Propagateing Alocasia Calidora
If you’re eager to create more of these magnificent giants, propagateing Alocasia Calidora is possible, primarily through rhizome division. While it might not be as simple as taking a stem cutting, it’s a rewarding process that allows you to expand your collection.
A Step-by-Step Guide (Rhizome Division)
Alocasia Calidora, like many alocasias, grows from a rhizome (a thickened underground stem) or corms. Propagateion is best done when you are already repotting the plant during the growing season.
- Unpotting: Carefully remove the plant from its pot, being gentle to minimize damage to the roots and rhizome. Lay the plant on its side or gently support it as you slide it out.
- Locating Rhizomes/Corms: Gently brush away excess soil to expose the root ball and the main rhizome. Look for smaller offsets or corms attached to the main plant. These are potential new plants.
- Separating Divisions: Using a clean, sharp knife or sterilized pruning shears, carefully separate the smaller offsets or corms from the parent plant. Ensure each division has at least one growth point (a visible bud) and some roots attached. For corms that haven’t sprouted yet, you can pot them up separately.
- Potting Divisions: Pot each division or corm in a small pot filled with a well-draining potting mix, similar to the mix used for the parent plant. Plant them at the same depth they were previously growing.
- Providing Aftercare: Water the newly potted divisions lightly. Place them in a warm location with bright indirect light. To increase humidity around the plant and encourage root development, you can cover the pot and plant loosely with a clear plastic bag or place them in a propagator or terrarium if they are small enough.
- Patience: Be patient! It can take several weeks for new growth to appear from divided rhizomes or corms. Maintain consistently moist soil (but not waterlogged) and high humidity during this establishment phase.
Other Propagateion Methods
While rhizome or corm division is the most common and reliable method for Alocasia Calidora, other methods like growing from seed are generally not practical for home growers due to availability and the complexity of the process. Stem cuttings are not a viable method for alocasias like Alocasia Calidora.
Potting and Repotting Alocasia Calidora
Proper potting and repotting Alocasia Calidora are essential practices for its continued health and vigorous growth. Choosing the right pot and soil mix and knowing when and how to repot can prevent issues like root binding and nutrient depletion, which are common problems.
Choosing the Right Potting Soil
As emphasized in the care section, a well-draining potting mix is paramount for Alocasia Calidora. The soil must allow water to drain freely while providing sufficient aeration for the roots.
- Recommended Soil Mix Components: Aim for a chunky mix. A good base of indoor potting soil mixed with perlite, orchid bark, and perhaps some coco coir is ideal. The perlite and orchid bark improve drainage and aeration significantly.
Repotting
Alocasia Calidora is a relatively fast grower with the right conditions, so it will likely need repotting every 1-2 years, or even annually if it’s growing particularly vigorously. Repotting provides fresh soil, replenishes nutrients, and gives the roots more space to expand.
- Signs That It’s Time to Repot:
- Roots are growing out of the drainage holes at the bottom of the pot.
- The plant appears top-heavy and unstable in its current pot.
- Water runs straight through the soil very quickly without seeming to moisten it, indicating the soil has broken down or the roots are too compacted.
- Growth has significantly slowed down despite optimal care.
- You can see a dense mass of roots when you gently lift the plant from its pot.
Step-by-Step Repotting Guide
Repotting your Alocasia Calidora can be a bit of a task due to its size, but follow these steps for a smooth transition:
- Prepare: Gather your new pot (1-2 inches larger in diameter than the current one), fresh well-draining potting mix, gloves (the sap can be irritating), and a tarp or newspaper to protect your workspace.
- Remove the Plant: Gently remove the plant from its pot. If it’s stuck, you can try tapping the sides of the pot or carefully running a knife around the inner edge. Be careful not to damage the leaves or stems.
- Inspect Roots: Gently loosen some of the outer roots from the root ball. Inspect the roots for any signs of root rot (mushy, dark roots) or pests. Trim away any unhealthy roots with clean, sharp shears.
- Add Soil to New Pot: Add a layer of fresh potting soil to the bottom of the new pot.
- Position the Plant: Place the Alocasia Calidora in the center of the new pot, ensuring the top of the root ball is about an inch below the rim of the pot. This leaves space for watering.
- Fill with Soil: Fill the remaining space around the root ball with fresh potting soil, gently tamping it down as you go to remove air pockets. Do not compact the soil too tightly.
- Water Thoroughly: Water the plant thoroughly after repotting until water drains from the drainage holes. This helps the soil settle and hydrates the roots.
Common Pests & Plant Diseases of Alocasia Calidora
Like many tropical plants grown indoors, the Alocasia Calidora can occasionally encounter common pests and diseases. Vigilance and prompt treatment are key to keeping your plant healthy and preventing minor issues from becoming major problems. Regularly inspecting your plant’s foliage is the best defense.
Common Pests
- *Spider Mites: These tiny pests love dry, warm conditions and are a frequent issue, especially in winter. They feed on plant sap, causing stippling on leaves and fine webbing. Increase humidity around the plant to deter them and wash the leaves with a strong spray of water. Treat with insecticidal soap or neem oil, ensuring full coverage, especially on leaf undersides.
- Mealybugs: Looking like small, white, cottony masses, mealybugs are sap-suckers that cluster in leaf axils and along stems. They weaken the plant and excrete sticky honeydew. Isolate the infested plant. Remove visible mealybugs with a cotton swab dipped in rubbing alcohol. Treat with neem oil or insecticidal soap.
- Aphids: These small, soft-bodied insects are often found on new growth, sucking sap and causing distortion. They also produce honeydew. Wash them off with water or treat with insecticidal soap or neem oil.
- Scale: Scale insects are immobile, appearing as small bumps on stems and leaves. They feed on sap and can weaken the plant over time. Scrape off visible scales with a fingernail or alcohol-soaked cotton swab. Treat severe infestations with horticultural oil or a systemic insecticide.
Plant Diseases
- *Root Rot: The most common disease for Alocasia Calidora, almost always caused by overwatering and poor drainage. Symptoms include yellow leaves, drooping, stunted growth, and a mushy stem base. Prevent by using a well-draining potting mix, a pot with drainage holes, and allowing the soil to dry slightly between waterings. If caught early, you can try repotting into fresh, dry soil after trimming away diseased roots.
- Leaf Spot: Various fungal or bacterial pathogens can cause leaf spots, appearing as discolored patches on the foliage. Often a result of high humidity combined with poor air circulation or wet leaves. Avoid overhead watering, improve air circulation, and remove affected leaves. Fungicides may be necessary in severe cases.
Common Issues with Alocasia Calidora
Even with diligent care, you might encounter some common problems with your Alocasia Calidora. Knowing what to look for and how to react is key to keeping your plant healthy.
- *Yellowing Leaves: This is perhaps the most common symptom and can indicate several things: most often overwatering or underwatering, but also insufficient light, nutrient deficiency, or the plant shedding an old leaf. Check soil moisture first, assess light conditions, and consider if it’s time for fertilizer or repotting.
- Brown Leaf Tips or Edges: Typically a sign of low humidity or inconsistent watering. Can also be caused by fertilizer burn or tap water with high mineral content. Increase humidity around the plant, ensure consistent watering, use diluted fertilizer, and consider using distilled or filtered water.
- Drooping Leaves: Usually indicates a water issue – either too much or too little. Check the soil moisture. If it’s dry, water thoroughly. If it’s wet, hold off on watering and check for root rot. Temperature stress can also cause drooping.
- Stunted Growth: If your Alocasia Calidora isn’t growing, it could be due to insufficient light, lack of nutrients, being root-bound, or simply being in dormancy during fall and winter months. Ensure adequate indirect light, fertilize during the growing season, and check if it’s ready to be repotted into a larger pot.
- *Root Rot: As discussed, this is a serious issue caused by overwatering and poor drainage. Symptoms include yellowing, drooping, and a mushy stem. Prevention is key, but if detected early, repotting into fresh, dry soil and trimming diseased roots might save the plant. Ensure the pot has drainage holes and use a well-draining potting mix.
Alocasia Calidora: An In-Depth Look
The Alocasia Calidora is a popular hybrid, the result of crossbreeding Alocasia odora and Alocasia gageana. This hybridization was performed to create a robust plant with large, attractive leaves that is well-suited for cultivation as a houseplant. Unlike some wild Alocasia species with specific, limited native ranges, Alocasia Calidora is a cultivated variety primarily found in nurseries and indoor gardens worldwide.
- Botanical Characteristics: Alocasia Calidora is a herbaceous perennial rhizomatous plant. It’s known for its impressive size, with mature plants reaching up to 6-8 feet (1.8-2.4 meters) in height and spread indoors under ideal conditions, though they often remain smaller in typical home environments. The leaves are sagittate (arrowhead-shaped), large, glossy, and have a prominent ripple or wave along the edges. They emerge from a central rhizome and are supported by thick, sturdy petioles.
- Growth Habit: Alocasia Calidora typically grows upright and outward, creating a bold, sculptural form. It can enter a period of dormancy in the fall and winter months, especially if temperatures or light levels drop significantly, where it may shed some or all of its leaves. New growth resumes in spring.
Relevant Names
- Scientific Name: Alocasia ‘Calidora’ (as a hybrid, it’s often listed with single quotes around the name)
- Common Names: Alocasia Calidora, Giant Elephant Ear, Calidora Elephant Ear. Sometimes simply referred to as a large Alocasia.
Warning
Alocasia Calidora, like many other Alocasia species and plants in the Araceae family, contains calcium oxalate crystals in all parts of the plant. These crystals are toxic if ingested.
- Ingestion Hazard: If chewed or eaten, these crystals can cause severe irritation to the mouth, tongue, and throat, leading to pain, swelling, difficulty swallowing, and vomiting.
- Keep Out of Reach: Always keep your Alocasia Calidora out of reach of children and pets (dogs, cats, etc.) who might be tempted to nibble on the leaves.
- Skin Irritation: The sap from cut stems or leaves can also cause skin irritation or dermatitis in sensitive individuals. Wear gloves when handling the plant, especially during pruning or repotting. Wash hands thoroughly after contact.
Conclusion
The Alocasia Calidora is a truly magnificent tropical plant that brings unparalleled drama and beauty to any indoor garden. Its impressive size and stunning dark green leaves make it a captivating focal point, rewarding you with lush foliage when its needs are met. While it requires attention to detail, particularly regarding bright indirect light, consistently moist but not soggy soil, and high humidity, the effort is undoubtedly worth it.
By following the care tips outlined in this guide – from selecting the right pot and soil mix, to proper watering and fertilizer, and addressing common problems promptly – you can successfully grow a thriving Alocasia Calidora. Embrace the journey of nurturing this giant Elephant Ear and enjoy the transformation it brings to your home decor. Your magnificent Alocasia Calidora will stand as a testament to your care and dedication.
FAQ
Q1: How big can Alocasia Calidora get indoors?
While they can reach 6-8 feet in ideal conditions, Alocasia Calidora typically grows to about 3-5 feet tall indoors in average home environments, with leaves up to 3 feet long. Proper potting and repotting Alocasia Calidora and consistent care contribute to its size.
Q2: Why is my Alocasia Calidora dropping leaves?
Leaf drop in Alocasia Calidora can be a sign of stress, often triggered by changes in environment, inconsistent watering (both overwatering and underwatering), temperature fluctuations, or entering dormancy in the fall and winter months. It’s also natural for alocasias to shed older leaves as new growth emerges.
Q3: Does Alocasia Calidora need high humidity?
Yes, Alocasia Calidora absolutely requires high humidity to thrive. Low humidity is a common problem and can lead to brown leaf tips and edges. Use a humidifier, pebble tray, or grouping to increase humidity around the plant.